

PRODUCTS USED
PROJECT DETAILS
Students make flowers in various stages of blooming from eighth, quarter and full circles of tissue paper.
LESSON PLAN IDEAS
Developed by: Kathy Barbro, Visual Arts Professional Expert from Dixie Canyon Community Charter Elementary School in Sherman Oaks, CA
LEARNING OBJECTIVE
For Grade: 3
Students practice cutting folded paper to make circles. They learn how to make concentric circles for the full flowers and then how to fold them into quarters and eighths to make buds.
CORE STANDARDS
CCSS.Math.Content.3.G.A.2 Partition shapes into parts with equal areas. Express the area of each part as a unit fraction of the whole. For example, partition a shape into 4 parts with equal area, and describe the area of each part as 1/4 of the area of the shape.
STEPS
Students cut three stems from green paper and glue them to a blue background.

Students are shown how to cut circles from folded pieces of tissue paper. They are to make flowers in three stages of growth: eighth and quarter circle buds and full blooms. The full flowers are made from at least three layered concentric circles, the quarter from folding one circle in half 2 times, and the eighth from folding a circle in half 4 times. Students make at least one of each type of flower and glue just the centers to the paper.

Small cup-like shapes are cut from the green paper and glued to cover the bottom of each bud. Small leaves are also cut out and glued to balance out the art.
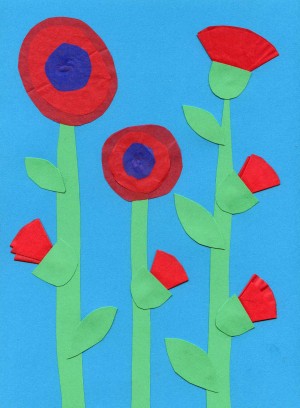
Blooming Tissue Paper Flowers